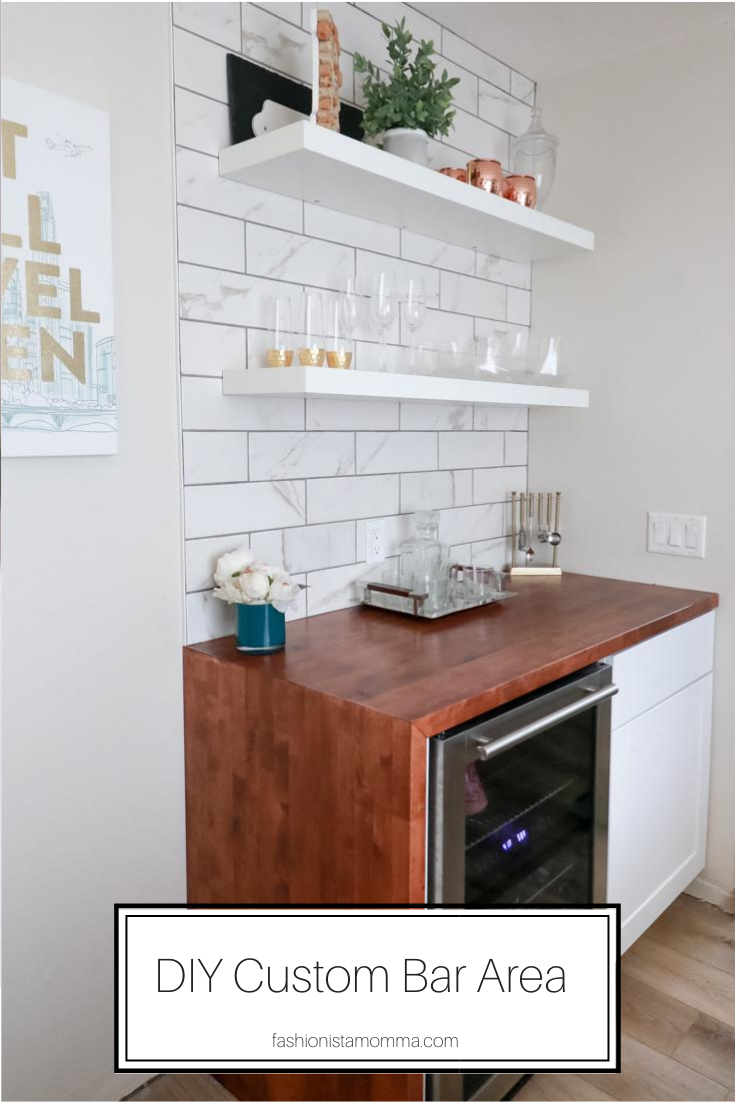
DIY Custom Built Bar Area
Hi Lovelies! Happy Friday. I have really neglected this space these past few weeks. It even feels so strange to sit down and get back to typing and sharing content. I have to get back in to the swing of things and getting myself back to my routine. Today, I wanted to share my home project my husband and I have been working on. This is the first project we have finished all the way through. This is our custom built bar area and the steps we took to build it.


Supply List
- Wine fridge
- Matching cupboard to our kitchen, toe kick dishwasher end panel
- Butcher block, stain, sealer
- tile, grout, schluter, spacers, thin set
- floating shelves
Building Steps To Follow Custom Built Bar Area
- Position the cupboard, wine fridge, and dishwasher end panel.
- Custom cut the butcher block to create a waterfall edge. This was done at 45 degree angle with a table saw. It was also really stressful.
- Stained and sealed counter top. Allow to dry and then install.
- Installed tile with thin set and spacers. Allowed to dry for several hours. Be sure to mark where your wall studs are before mounting tile.
- Apply grout in sections wiping down with wet sponge.
- Installed shelves with a carbide tipped tile drill bit. This is important because you do not want to crack the tile when mounting the shelves. Our shelves were mounted 20 inches from counter top for bottom and shelf and 16 inches between shelves.
- Final step and my favorite part is decorating your space. Find statement glasses and pieces to put on the open shelves.
Shop The Supplies Here:
Fridge | Cupboard | Countertop | Stain | Sealer | Tile | Shelves (similar) | Copper Mugs | Mixer Set


Love how this came out, it looks so good! Also loving that the dishwasher is hidden, looks so much nicer. Great job!